A Step-by-Step Guide to Products, Pricebooks, Price Groups, and Proposals
To start estimating and building proposals in Poologics, follow these steps in order:
- Pre-Import: Customize the Budget Items and Take-Offs
- Import your Products into the Application
- Assemble the products into a Pricebook
- Build your first Price Group
- Build your Proposal Template
This Takes Time & Focus
Onboarding your Products into Poologics is one of the highest ROI activities that you can do, but it also takes time and focus to get up and running.
From an onboarding perspective, these modules should be onboarded AFTER adding your opportunities and projects to the application and getting the records up-to-date with documentation and updating schedules.
Onboarding the Estimate and Proposal module can be done prior to adding opportunities and projects, but we simply don't advise it because prioritizing this first can keep your team from seeing immediate value.
1. Pre-Import: Customize the Budget Items and Take-Offs
First, what's a budget item?
- A Budget Item is a project cost account such as Steel, Electrical, Plumbing, etc.
- Each Budget Item will likely have many products for Estimating
- The Budget Item is NOT customer-facing on the proposal.
- Products must be assigned to a Budget Item
How does this fit into estimates and projects?
- When building the estimate, you will pick products from these Budget Items.
- When you associate this estimate with a new project in Step 1 of the Project Creation Wizard, the products aggregate their costs into the Budget Item (account) and set the Original Budgets for the Project.
Many builders won't need to customize these budget items because we provision 49 Budget Items into instances. When we talk about customizing the budget items, at this step in the process, it's more important to add what you need than it is to remove what you don't need. Ultimately, these system settings will customize the import document.
To customize your Budget Items:
- Go to Settings > Budget Items
- Click the Line Items in the Table
- Click the Edit Button

Customizing Your Take-Offs
When estimating, the take-offs will populate the quantity field of the associated products. Connecting take-offs to the products AND adding these products to price groups will save much time and effort. More to come on this.
Poologics gets you started with commonly used take-offs inspired by the latest design software, but you can also add your own custom take-off fields:
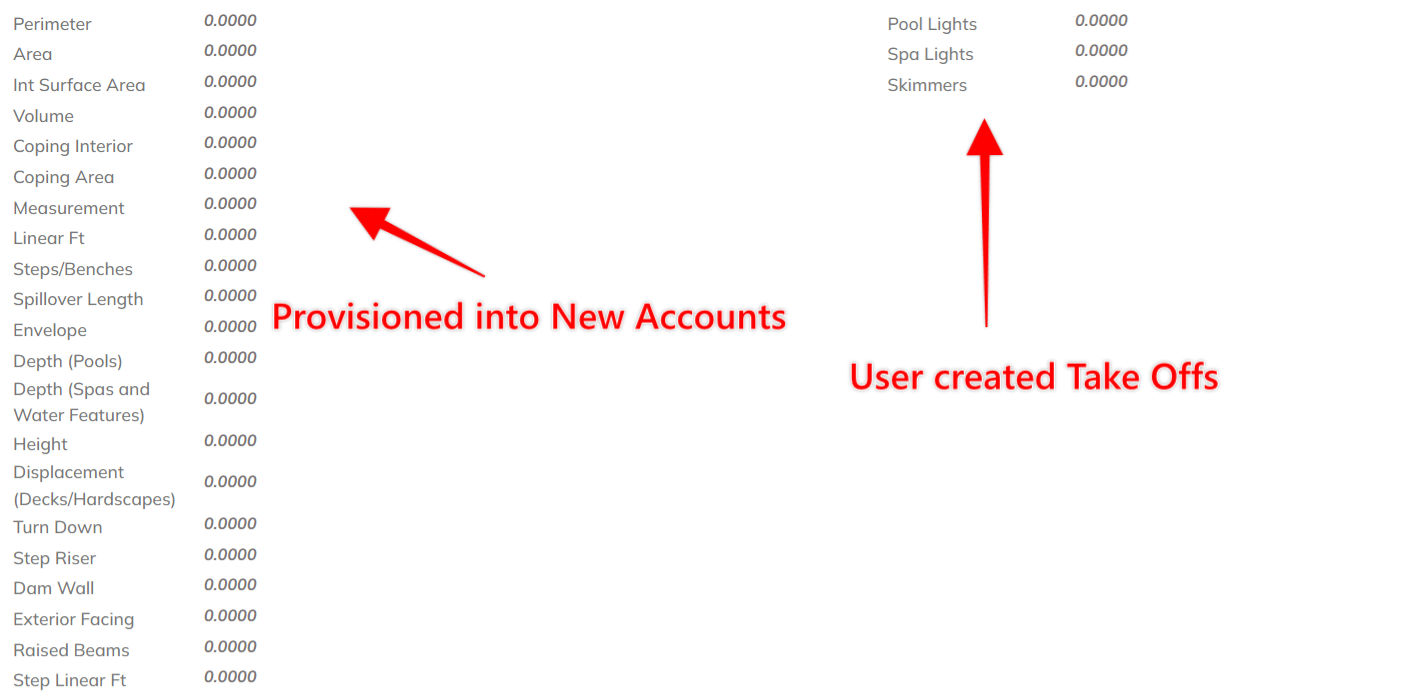
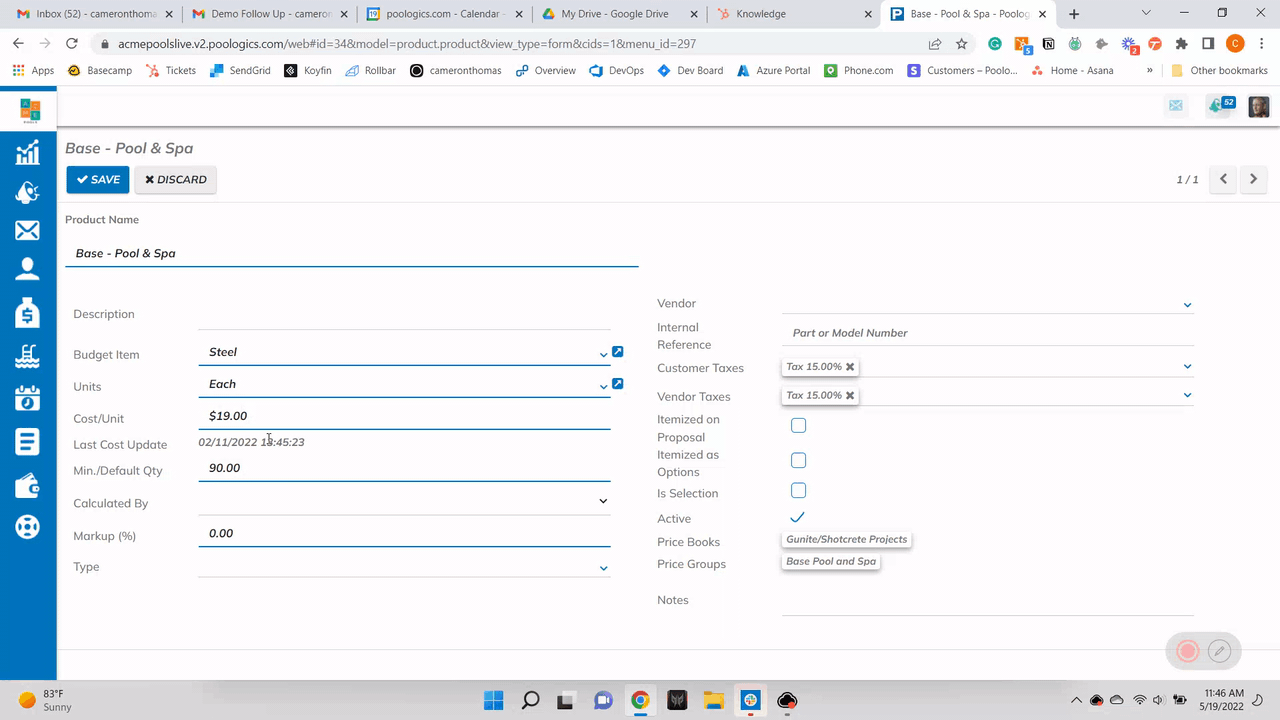
These fields map to the Product's "Calculated By" Field:
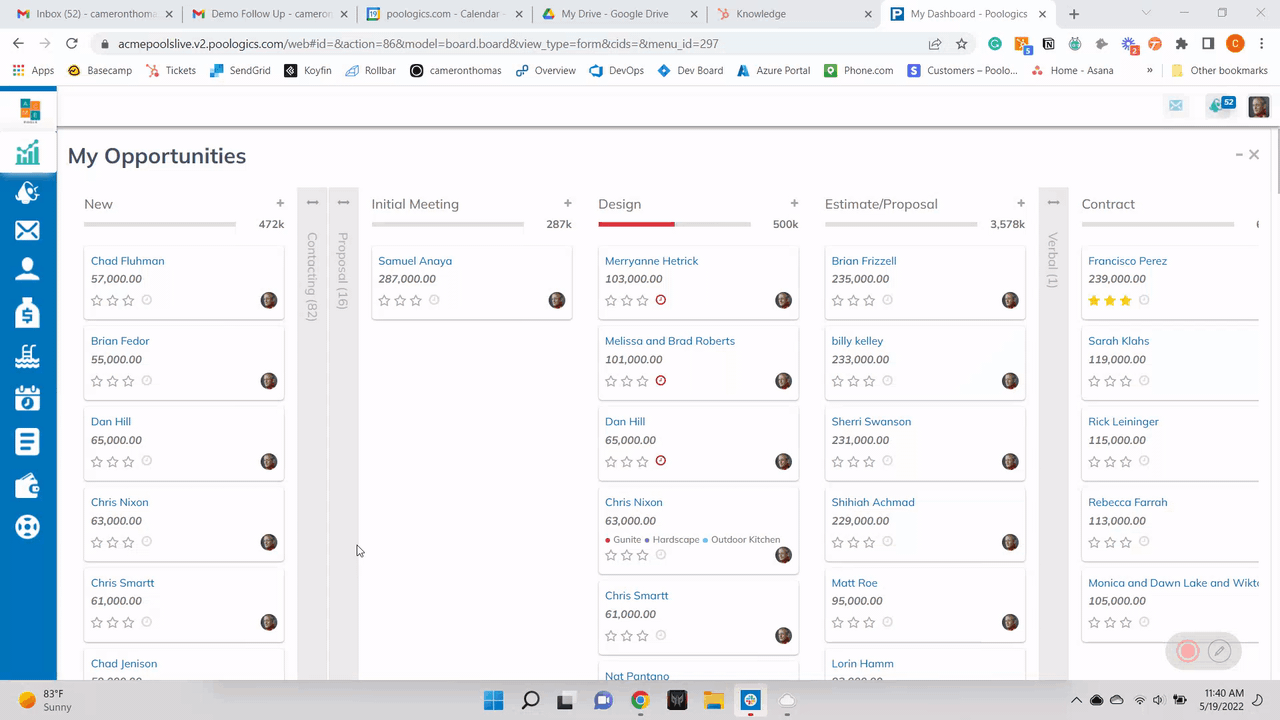
To Create more Take-offs:
Go to settings > Take Offs.
2. Import your Products into the Application
First, let's get the import document from the application:
- Go to Settings > Import Data
- Select "Products" in the dropdown
- Click "Download Sample"
- Click the active link of the spreadsheet to download.
We're here to help!
Prior to import, we often look over our users import documents to check the formatting, look for red flags, and heal data where necessary. If you're stuck or struggling, send us an email at support@poologics.com.
Product Import Fields
- Product Name Field - (Required) customer-facing when the product is itemized or marked as an option
- Product Description - (Not Required) customer-facing when the product is itemized or marked as an option
- Notes - (Not Required) internal notes for yourself to better understand the product and how to bid it
- Part Number - (Not Required)
- Product Type - (Not Required) a field to help you filter and group product tables.
- Budget Item - (Required) associated cost account
- Cost/Unit - (Required) base unit cost
- Units - (Not Required, defaults to "Each"), Unit of Measure
- Min./Default Quantity - (Required). When the product is activated on the estimate, this will be the default value. Associated Take Off Quantities cannot go below this value.
- Calculated By - (Not Required). Connects the product to a take off.
- Vendor - (Not Required) the associated subcontractor, retailer, or supplier
- Itemized on Proposal - (Not Required, Defaults to No) breaks the product out beneath the "Base Price" section of the proposal. Product and Product Description will show up in the proposal.
- Itemized as Options - (Not Required, Defaults to No) Shows up beneath pricing as an "Option". Product represents a "Suggestion", Enhancement, or Upgrade.
- Is Selection? - (Not Required, Defaults to No) When this product is apart of an estimate that becomes associated with a project, it will create a Selection Subtask upon Project Creation.
- Markup - (Required) Calculation for Unit Price = (1+ % Markup) x total cost per Unit *
*If the product has an associated vendor tax, the tax will be added to the cost per unit prior to marking up the product.
If you didn't set up any associations between products and take offs in the import, now would be the time to do it. Go to the Product and specify the take off using the "Calculated By" field.
3. Assemble the products into a Pricebook
Once you've imported your products, it's time to build the first pricebook. You can have as many pricebooks as you want, but when you're building an estimate, it will require you to choose a pricebook. You cannot choose multiple.
Pricebooks can be assembled by project type (New Construction, Remodel), Product Type (Gunite, Fiberglass, Vinyl Liner, etc), city, or whatever else you want. All of this is possible, but start simple.
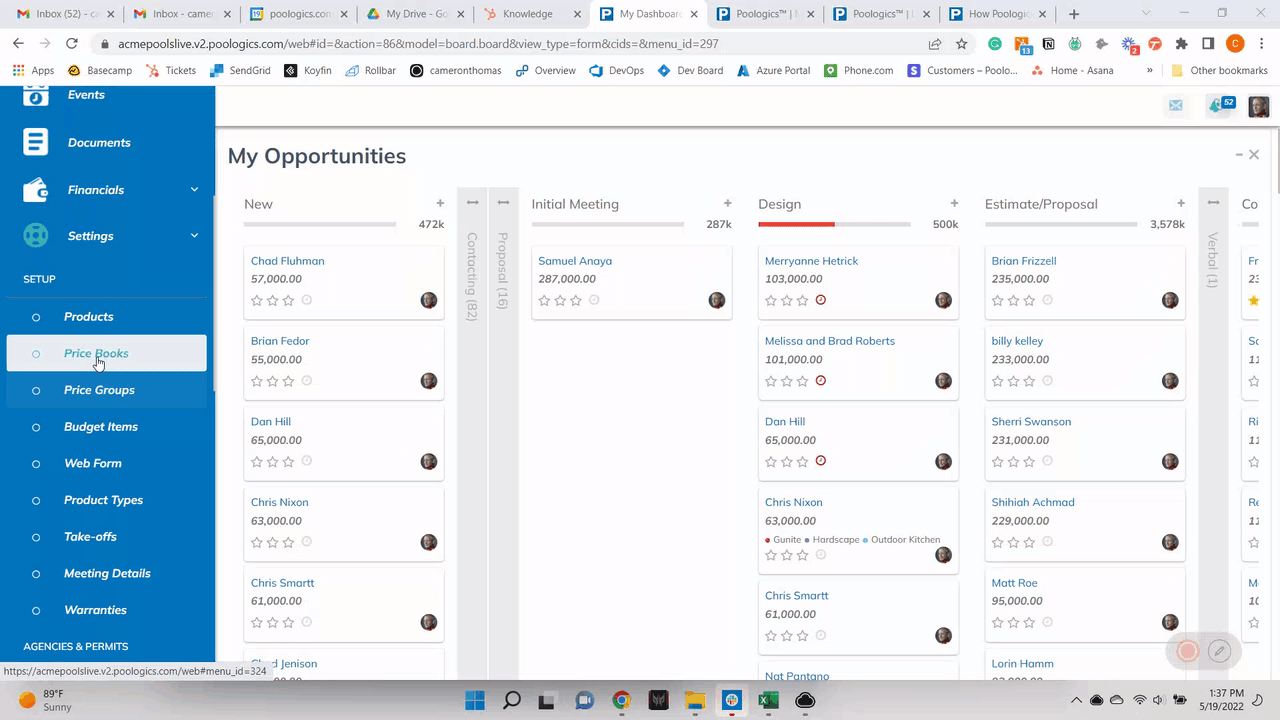
To Add Products to Pricebook:
- Go to Settings > Pricebooks
- Create or Select a Pricebook
- Click Add Products
- Select or Multiselect Products from the Product List, and hit confirm.
Pool School Part 1: Products, Pricebooks, and Price Groups.
What if you want to use the same product in multiple pricebooks, but depending on the city or project type, they might have different costs or markups?
When you create a product in Poologics, the application treats this product like a template. When you add this product to a pricebook a "new" variation of the product is created so that you can make adjustments for that specific pricebook.
What happens when you need to update costs? Well, it depends on what your intention is. Do you want to adjust the product template and have that adjust ALL product variations in all pricebooks? If so, select the product from the product list, hit the action button at the top of the screen, and then select "Update Pricebooks."
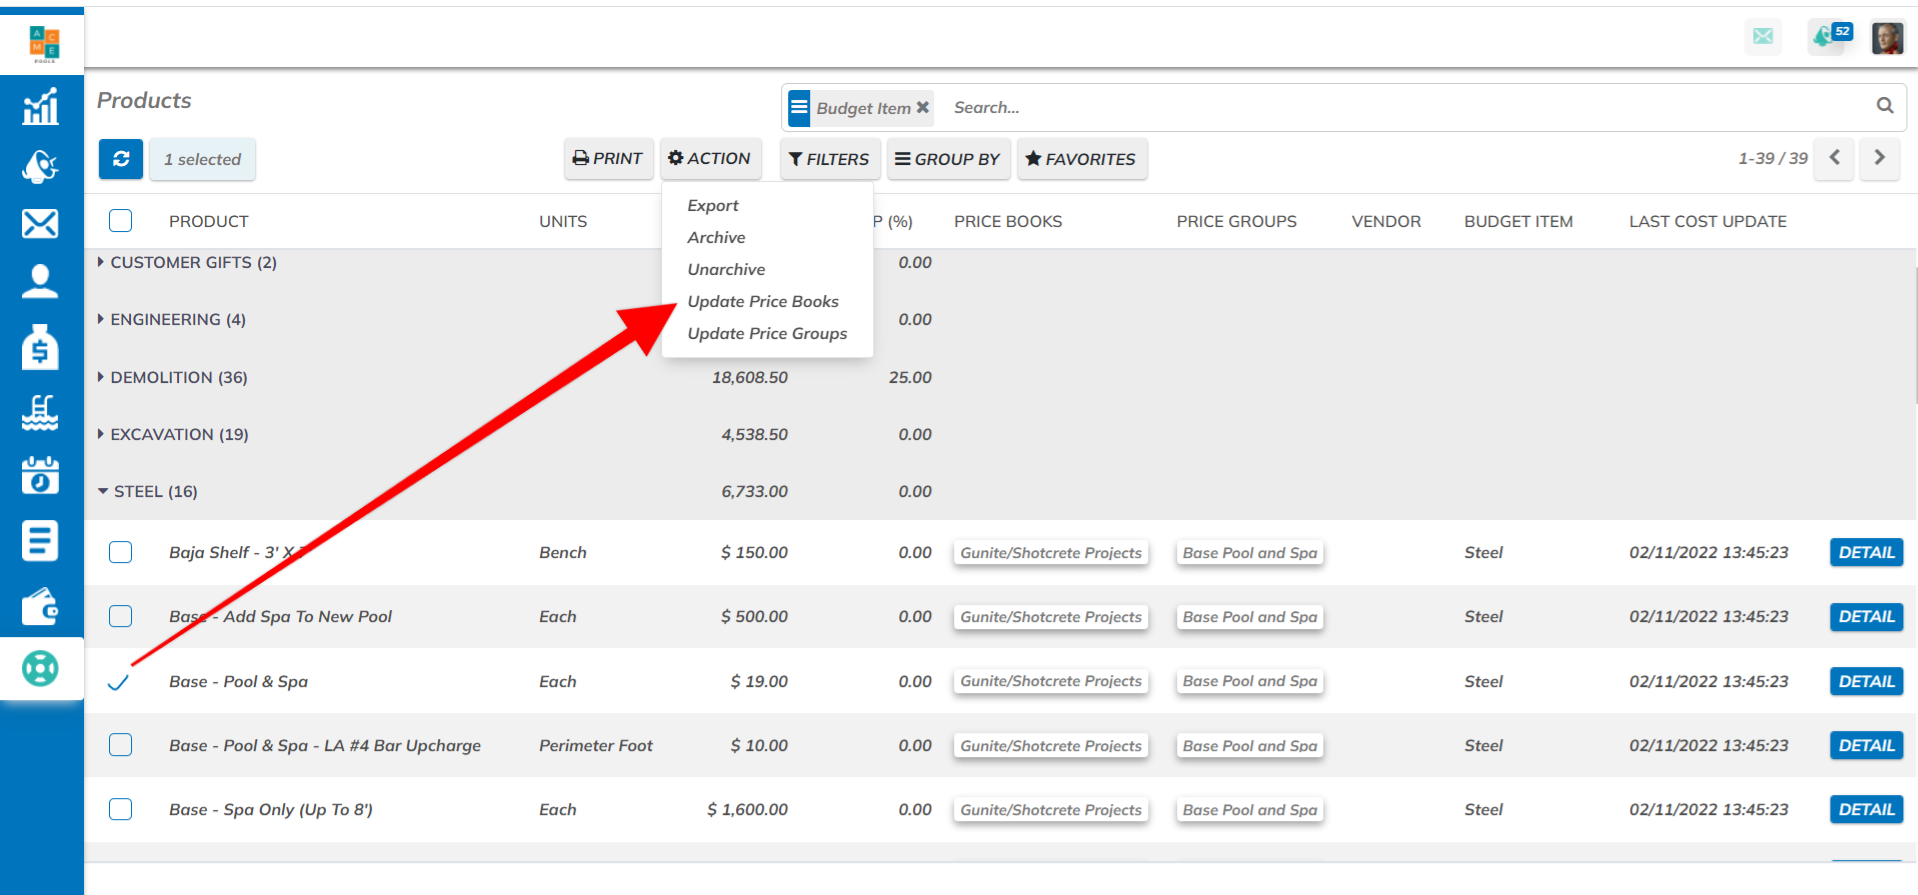
If you want to update a cost "local" to a specific pricebook, simply go to the pricebook section, select the pricebook > Product, and then update it. Stay tuned for how this works with Price Groups.
4. Build your first Price Group
What's a Price Group? A price group is subset of your products from your pricebooks that you want to ACTIVATE onto an Estimate. Let's give some examples:
- Base Pool
- Base Pool - West Austin (Higher Markup), Travel Surcharges, etc.
- Base Spa
- Base Pool - West Austin (Higher Markup), Travel Surcharges, etc.
- In Floor Cleaning System
Multiple Price Groups can be selected per estimate! Stack 'em up.
To Add Products to Price Group:
- Go to Settings > Price Group
- Create > Select a Price book (or Select an Existing Price Group)
- Click Add Products
- Select or Multiselect Products from the Pricebook and hit confirm.
Pool School Part 2: Products, Pricebooks, and Price Groups.
When you build an estimate, how does Poologics know which version of the product to choose? Glad you asked.
When you build an estimate, you must select a pricebook. Thus, all of the products that you choose to add to an estimate are products that have been added to the pricebook. The Price Book version trumps the base Product.
What happens when you choose a Price Groups?
Products within a price group are also another version of the product from the Price Book, but this version trumps the Pricebook version. Why?
This allows you to have a Base Price for one area vs. another area. It's a way to be more nimble and accurate with your pricing. The Price Group Product can be different from the Price Book Product and the base Product from the product list.
Furthermore, Price Groups are the highest and most actionable version of the product. When the user selects a price group when making an estimate, the intention is to ACTIVATE the products associated with that price group.
5. Build your Proposal Template
Time to put your creative hat on! 🎩
We provision a sample proposal into every account to help the builder get started, but you do not have to use it. Build your own if you want.
To build a proposal template:
- Go to Settings > Proposal Templates
- Click Create > then name the Proposal Template
- Save and Click "Design Proposal"
- Click the Edit Button at the top right of the page.
- While in Edit Mode, drag and drop "blocks", update color schemes, icons, fonts, upload images.. have some fun and make it yours.
- If you're pressed for time, it's easy enough to use a Text Area block and copy/paste your existing proposal format into Poologics. Circle back when you're feeling more creative.
- The Pricing Section will show up at the bottom by default. Here's the format:
- Base Price (all products that are NOT itemized will aggregate into the base price)
- Itemized Products - Product & Product Description will show up on the Proposal along with the total for the line item
- Pricing summary
- Options (Products marked as options, upgrades, enhancements.. Always be selling)
Happy Estimating!
